Hailstorms don’t just leave dents they leave financial consequences. If you want a fair payout, knowing how to document hail damage for an insurance claim is not optional. It’s the difference between a full roof replacement and a frustrating underpayment. I’ve seen it happen. Two homeowners, same storm, same neighborhood, completely different results. The only difference? Documentation.
If you’re reading this, you’re already ahead. Most people wait until after a denied claim to learn this process. You’re doing pre-hire research. That’s smart. This guide will walk you through exactly how to document hail damage for an insurance claim step by step, in a way that’s practical, clear, and actionable. Let’s break it down.
Why Documentation Can Make or Break Your Claim
Insurance companies don’t pay based on what you say. They pay based on what you can prove. That means your claim is only as strong as your evidence.
After a hailstorm, everything comes down to:
- Proof of damage
- Proof of cause
- Proof of timing
- Proof of impact on your property
Miss one of those, and your claim weakens quickly. Miss multiple? You’re likely leaving money on the table. In storm-prone areas like Plano, insurance carriers often process high volumes of claims. That leads to faster inspections and, sometimes, less detailed evaluations. If you don’t have your own documentation, you’re relying entirely on their report. That’s a gamble.
Good documentation supports your claim. Great documentation protects it.
Understanding Hail Damage: What Insurers Actually Evaluate
Before you grab your phone and start taking pictures, you need to understand what matters. Not all damage is treated equally.
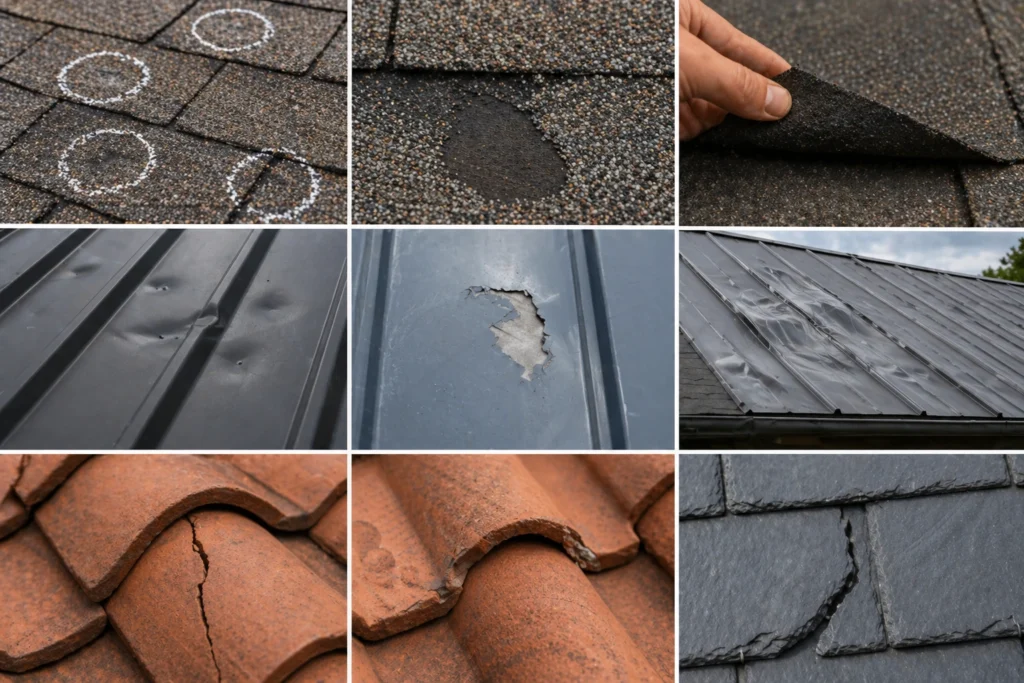
Roof Damage by Material Type
Different roofing systems react differently to hail.
Asphalt Shingles
- Granule loss exposing underlying mat
- Bruising that feels soft under pressure
- Circular impact marks that may not be obvious at first glance
Metal Roofing
- Visible dents or dings
- Coating damage that may lead to corrosion
- Deformation affecting water runoff
Tile or Slate Roofing
- Cracks that may not be visible from the ground
- Chips along edges
- Fractures that compromise structural integrity
The key isn’t just spotting damage. It’s documenting it in a way that shows it affects function—not just appearance.
Collateral Damage: Your Supporting Evidence
Here’s where many homeowners miss opportunities. Collateral damage helps prove storm severity.
Look at:
- Gutters and downspouts
- Window screens (often torn or punctured)
- HVAC condenser fins
- Siding panels
- Outdoor fixtures and furniture
If hail damaged metal vents and dented gutters, it strengthens the argument that your roof also took impact even if the damage isn’t immediately obvious.
Why Damage Gets Overlooked
Let’s be honest. Not every inspection is perfect.
Damage is often missed because:
- Adjusters have limited time per claim
- Subtle damage is harder to detect
- Focus tends to be on visible, obvious issues
That’s why learning how to document hail damage for an insurance claim yourself gives you an advantage. You’re not guessing you’re verifying.
Step-by-Step: How to Document Hail Damage for an Insurance Claim
This is where the real work begins. Follow this process carefully.
Step 1: Start With Safety First
Don’t rush. Don’t take risks.
After a storm:
- Surfaces may be wet or unstable
- Debris could create hazards
- Structural integrity may be compromised
Start from the ground:
- Walk around your property
- Use binoculars if needed
- Look for obvious signs of impact
If anything feels unsafe, stop. Documentation isn’t worth an injury.
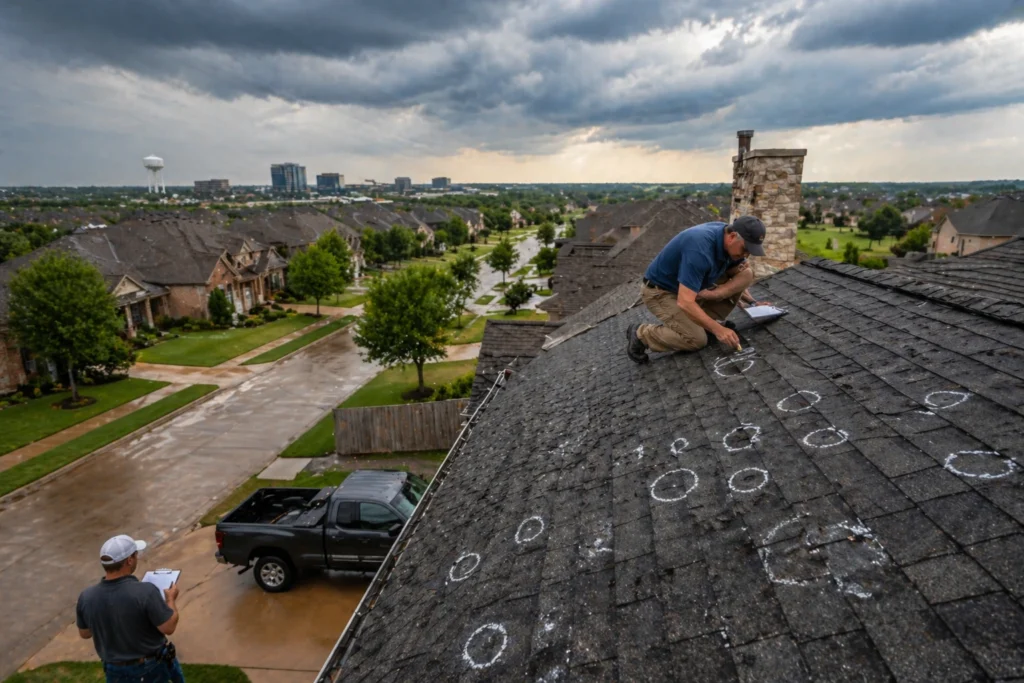
Step 2: Take Wide-Angle Photos
Start broad before going detailed.
Capture:
- Full roof from multiple angles
- Entire property layout
- Yard debris and fallen branches
- Nearby structures
These images establish context. They show the overall impact of the storm. Take more than you think you need.
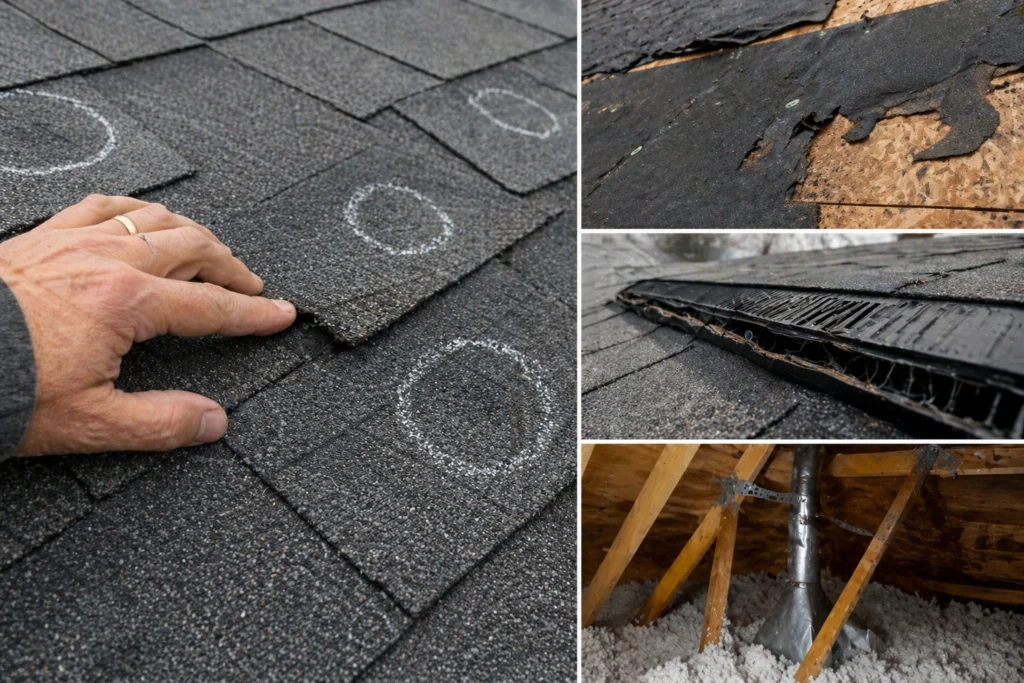
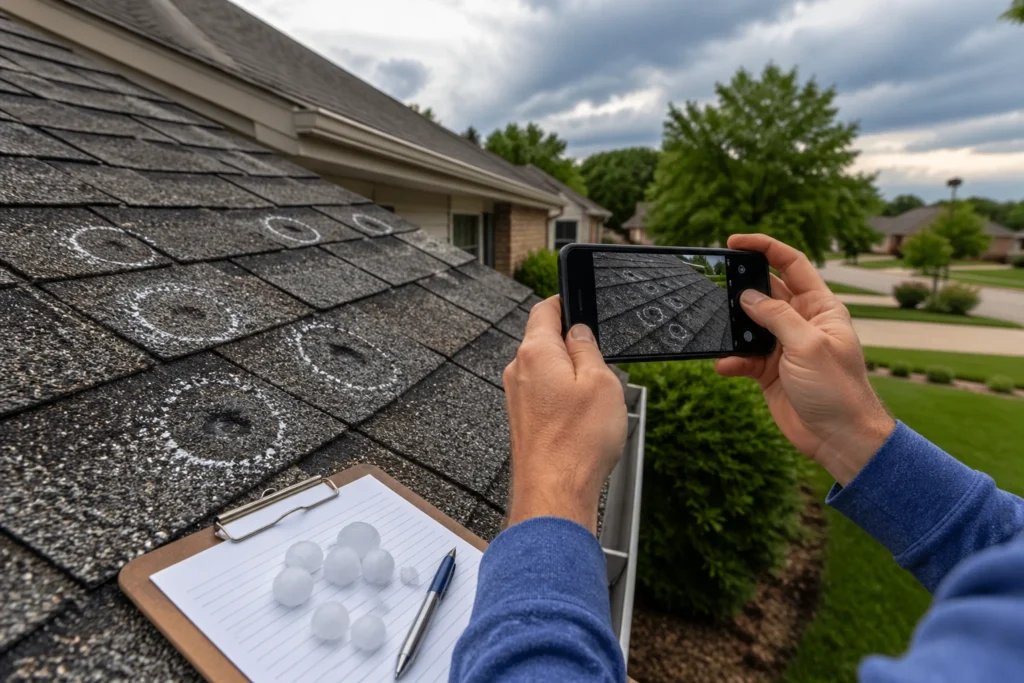
Step 3: Capture Close-Up Damage
Now focus on specifics.
Zoom in on:
- Individual shingles with damage
- Dented metal surfaces
- Cracked tiles
- Impact points on vents and flashing
Use chalk to mark hail hits. This helps highlight damage clearly in photos.
Take shots from different angles and lighting conditions. What’s invisible in one photo may stand out in another.
Step 4: Document Interior Damage
Exterior damage is only part of the story.
Go inside and check:
- Ceilings for water stains
- Attics for leaks or moisture
- Walls for bubbling or discoloration
- Insulation for dampness
Even small interior issues connect the damage to real consequences. That matters during claim evaluation.
Step 5: Record a Video Walkthrough
Photos are powerful. Video adds context.
Walk through your property and narrate:
- What you’re seeing
- Where the damage is located
- When the storm occurred
Start outside. Move inside. Keep it steady. This creates a visual timeline of the damage.
Step 6: Create a Detailed Damage Log
This step is often skipped. It shouldn’t be.
Write down:
- Date of the storm
- Time (approximate is fine)
- Hail size (if known)
- Areas affected
- Temporary repairs made
This log supports your visual evidence. It adds credibility and consistency.
Tools That Make Documentation Easier
You don’t need expensive equipment. But you do need the basics.
| Tool | Why It Matters |
| Smartphone | Clear photos and video |
| Chalk | Highlights impact points |
| Ladder | Access (only if safe) |
| Notebook/App | Tracks damage details |
| Moisture meter | Detects hidden leaks |
Simple tools. Big impact.
Common Mistakes That Cost You Money
Mistakes happen. But some are avoidable.
Avoid these:
- Taking too few photos
- Skipping close-ups
- Ignoring gutters, vents, and soft metals
- Waiting days or weeks to document
- Not backing up your files
- Repairing damage before documenting it
Each mistake weakens your claim. Combined, they can significantly reduce your payout.
How to Strengthen Your Claim Beyond Basic Documentation
Good documentation is the baseline. Strong documentation goes further.
Before-and-After Comparisons
If you have older photos of your home, use them.
Sources include:
- Real estate listings
- Inspection reports
- Personal photos
Showing the difference before and after the storm is powerful. It removes doubt.
Weather Reports Add Credibility
Support your claim with data.
Look for:
- Hail size reports
- Wind speeds
- Storm timing
This confirms that your damage aligns with a real weather event.
Professional Inspections Matter
Even if you’re documenting yourself, bringing in a professional adds weight.
They can:
- Identify subtle damage
- Provide detailed reports
- Create a full repair scope
This strengthens your position significantly.
What Insurance Adjusters Often Miss
Even experienced adjusters can overlook key issues.
Commonly missed items include:
- Shingle bruising that isn’t visible at a glance
- Underlayment damage beneath the surface
- Ventilation system issues
- Code upgrade requirements
These aren’t minor details. They can add thousands to your claim.
That’s why your documentation matters so much.
When You Should Consider a Public Adjuster
You don’t always need one. But sometimes, it makes sense.
Consider bringing one in if:
- Your claim is underpaid
- Damage is disputed
- The process feels overwhelming
A public adjuster works for you. Not the insurance company.
That changes everything.
The Supplement Process: Where Documentation Pays Off
Initial claims aren’t always final. Sometimes damage is missed. Sometimes it’s underestimated. That’s where supplements come in.
With strong documentation, you can:
- Reopen your claim
- Add missed items
- Increase your payout
Without documentation, supplements become difficult. With it, they become strategic.
Real-World Scenario: Weak vs Strong Documentation
Let’s compare.
| Category | Weak Documentation | Strong Documentation |
| Photos | Few and unclear | Detailed and labeled |
| Video | None | Full walkthrough |
| Log | Missing | Complete timeline |
| Inspection | None | Professional report |
| Outcome | Partial payout | Full replacement approval |
Same storm. Different outcomes. That’s the impact of knowing how to document hail damage for an insurance claim.
Timing: How Fast Should You Act?
Immediately.
Not tomorrow. Not next week.
Why?
- Evidence fades
- Damage worsens
- Memory becomes unreliable
Start documenting as soon as it’s safe. Then file your claim promptly.
Timing affects credibility.
Local Insight: Hail Claims in Plano
Location matters.
In Plano, hailstorms are frequent enough that insurance companies are very familiar with local claim patterns. That means:
- Adjusters may move quickly through inspections
- Certain damage types are scrutinized more closely
- Documentation needs to be clear and thorough
Local building codes also play a role. Repairs may need to meet updated standards, which can increase claim value.Working with professionals familiar with Plano can help you navigate these nuances effectively.
Advanced Tip: Think Like an Adjuster
Here’s a mindset shift that helps.
Ask yourself:
- Does this photo clearly show damage?
- Does it connect to the storm?
- Does it show severity?
If the answer is no, take another photo. Documentation isn’t about quantity alone. It’s about clarity and purpose.
A Note on Claim Complexity
Insurance claims often follow structured evaluation methods that resemble systems studied in fields like Bayesian inference, where new evidence continuously updates the likelihood of an outcome. In simple terms, the more high-quality proof you provide, the stronger your position becomes. This is exactly why understanding how to document hail damage for an insurance claim is so powerful it shifts probabilities in your favor.
Integrating Documentation Into Your Hail Damage Roof Insurance Claim Strategy
When you approach a Hail Damage Roof Insurance Claim, documentation shouldn’t be treated as a one-time task. It should be part of a broader strategy.
That means:
- Documenting immediately after the storm
- Continuing to track changes over time
- Updating your file as new damage appears
- Keeping communication records with your insurer
Think of your documentation as a living file. The more complete it is, the harder it is to dispute.
Final Checklist: How to Document Hail Damage for an Insurance Claim
Before filing your claim, make sure you have:
- Wide-angle property photos
- Close-up damage images
- Video walkthrough
- Interior damage documentation
- Written damage log
- Weather reports
- Backup copies of everything
If you can check all of these off, you’re in a strong position.
Conclusion: Documentation Is Your Leverage
Hail damage is more than a roofing issue. It’s a financial event. And your outcome depends on how well you document it. Learning how to document hail damage for an insurance claim gives you control. It gives you leverage. It puts you in a position to push back when something doesn’t look right. You don’t need to be an expert. You just need to be thorough. Consistent. Intentional.
If you’re in Plano, this is especially important. Storms are part of the reality here. Claims are part of the process. But outcomes? Those are influenced by preparation. Document early. Document thoroughly. And make sure your claim reflects the full scope of the damage. Because the strongest claims aren’t argued.
They’re proven.
FAQs
Start with safe, ground-level photos of your entire property before moving into close-up damage shots.
Take as many as needed to clearly show all affected areas wide shots, close-ups, and different angles.
Yes, interior signs like water stains or attic leaks help prove the impact of roof damage.
You can, but professional inspections often uncover hidden damage and strengthen your claim.
No, always document everything first, or you risk losing critical evidence for your claim.
As soon as it’s safe delays can weaken your claim and reduce credibility.
A smartphone, chalk, and a simple damage log are usually enough to get started.
It provides context and shows how damage is distributed across your property in real time.
Your documentation can be used to challenge their findings and support a supplement request.
Better documentation leads to stronger evidence, which often results in higher claim approvals.